Quick Start
Get up and running with ncprof in 5 minutes. This guide walks you through the complete workflow from installation to viewing your first trace.
Prerequisites Required
Before starting, ensure you have:
- Docker & Docker Compose installed and running
- Python 3.9+ installed
- VS Code 1.80.0+ installed
Don’t have these? See the Installation guide for setup instructions.
Step 1: Install the Extension
Install from VSCode Marketplace
The easiest way to install the extension is directly from the VSCode Marketplace:
- Open VS Code
- Go to the Extensions view (
Ctrl+Shift+XorCmd+Shift+X) - Search for “nCompass” or “ncprof” in the Extensions search bar
- Click Install on the “nCompass Performance Optimization IDE” extension
Alternatively, you can install directly from the VSCode Marketplace .
Initial Setup Prompts
On startup, the extension will prompt for 2 details:
- User Email - We don’t collect any trace or code data, but we do record tool crash logs along side the user email to aid us with fixing bugs.
- Trace Directory - This is a path on your local system which you are currently storing traces or plan on storing traces to. This is so that the tool knows where to look for traces to analyze.
Verify Extension Installation
- Open VS Code
- Go to the Extensions view (
Ctrl+Shift+XorCmd+Shift+X) - Search for “ncprof” or “NCProf GPU Trace Viewer”
- You should see the extension listed as installed
Watch our Installation Guide for a step-by-step walkthrough.
Note: Please ignore any mentions of installing from VSIX in this video. You can install directly from the VSCode Marketplace instead.
Step 2: Install the ncompass SDK
Open a terminal and install the ncompass Python SDK:
pip install ncompassVerify the installation:
python -c "import ncompass; print('ncompass installed successfully')"Step 3: View an existing trace
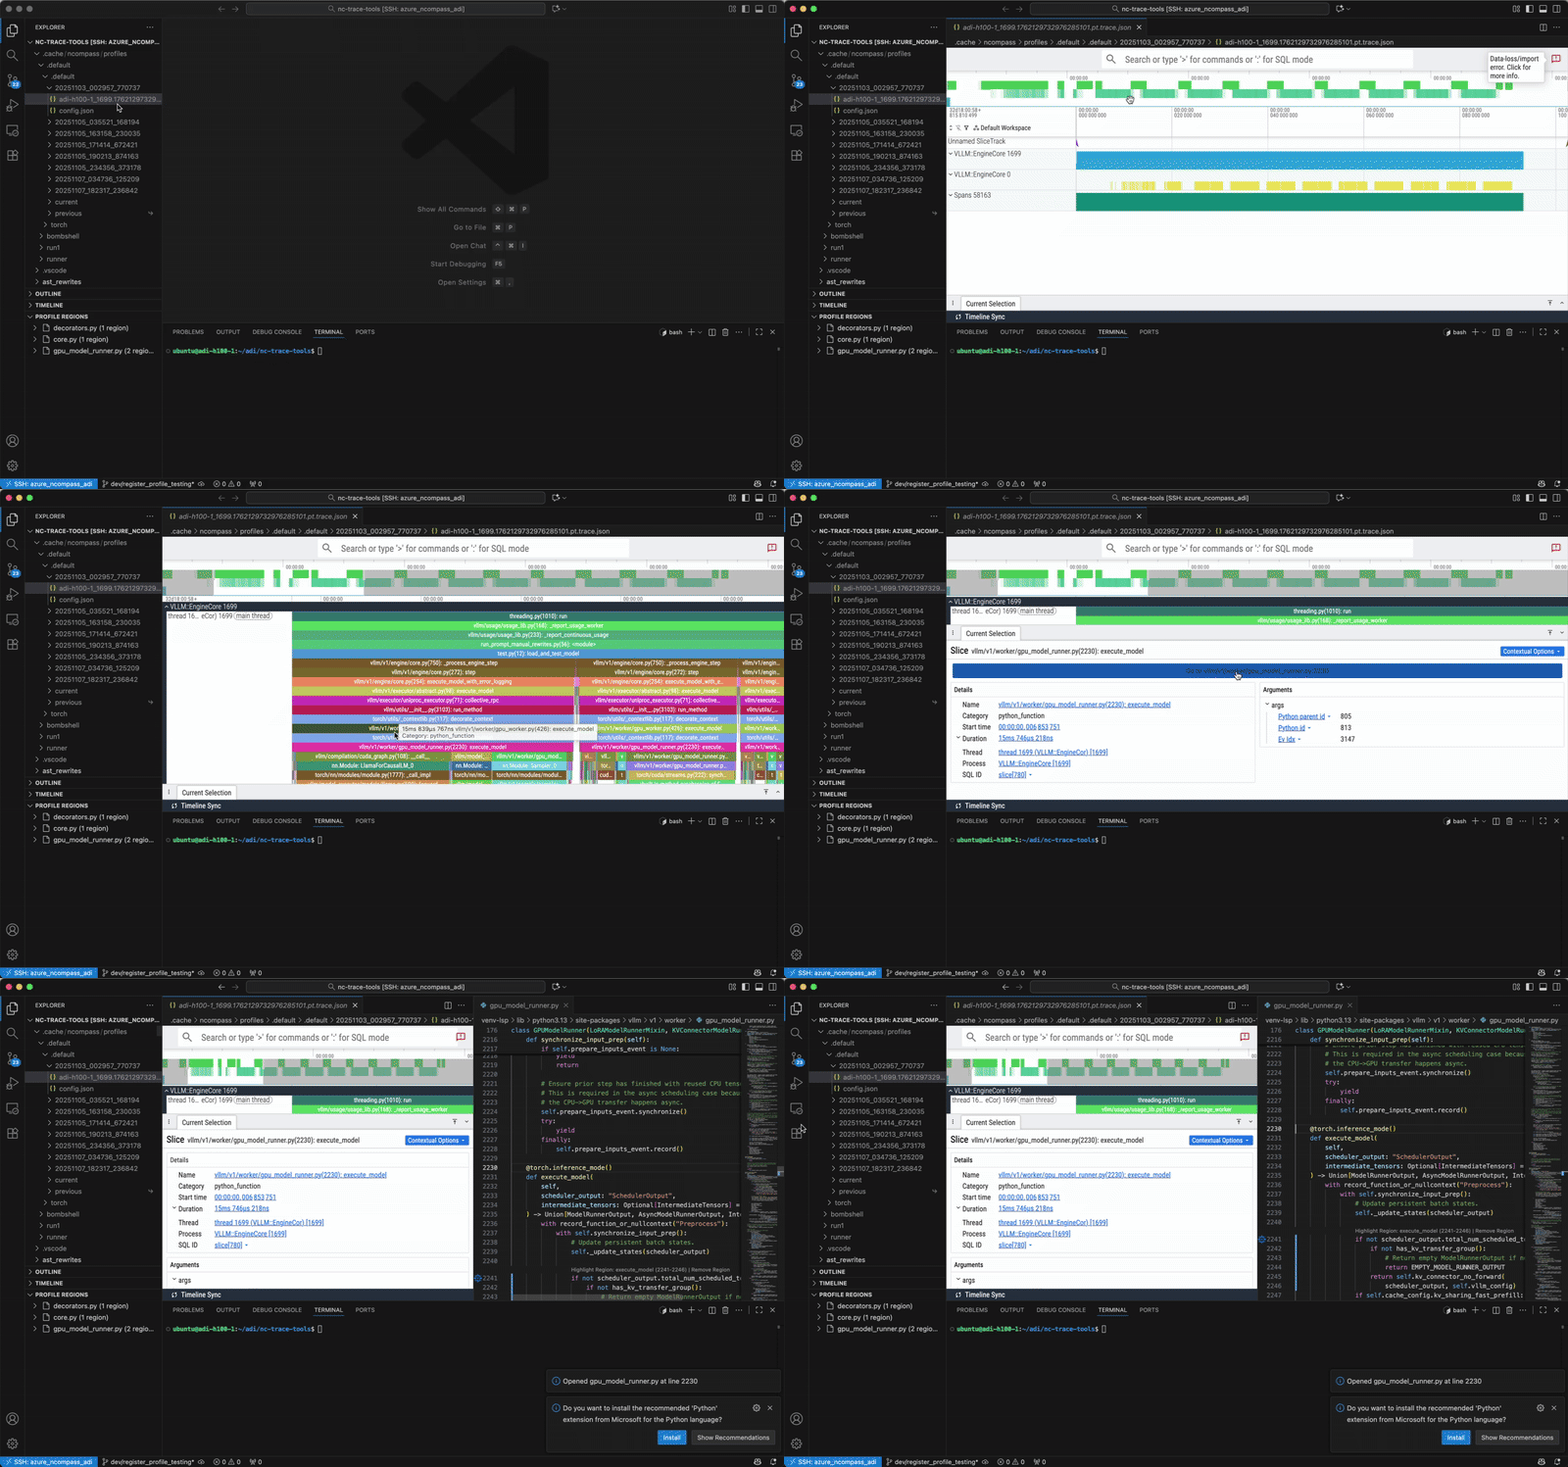
Open a trace file you have already generated in the ncprof viewer built into VSCode. If you don’t have an existing trace file, you can find examples on how to generate one in our examples repository .
- Right-click on the trace file in the Explorer
- Select “Open With…” → “GPU Trace Viewer”
- Explore the interactive timeline showing CPU/GPU activity
You can zoom, pan, and click on events to see details. For more details on controls, see Opening Trace Files.
If trace events contain file paths from your workspace, you can navigate directly to the source code.

Step 4: Start the Profiling Backend
Now that you can view a trace, in order to add custom tracepoints to select regions to profile, you need to start the profiling backend.
- Press
Ctrl+Shift+P(Windows/Linux) orCmd+Shift+P(Mac) - Type “NCProf: Start Profiler Backend (Docker)”
- Wait for the containers to start (you’ll see notifications in VS Code)
Tip: Enable auto-start by setting ncprof.backend.autoStart: true in your VS Code settings to automatically launch the backend when you open VS Code.
Step 5: Register a Tracepoint
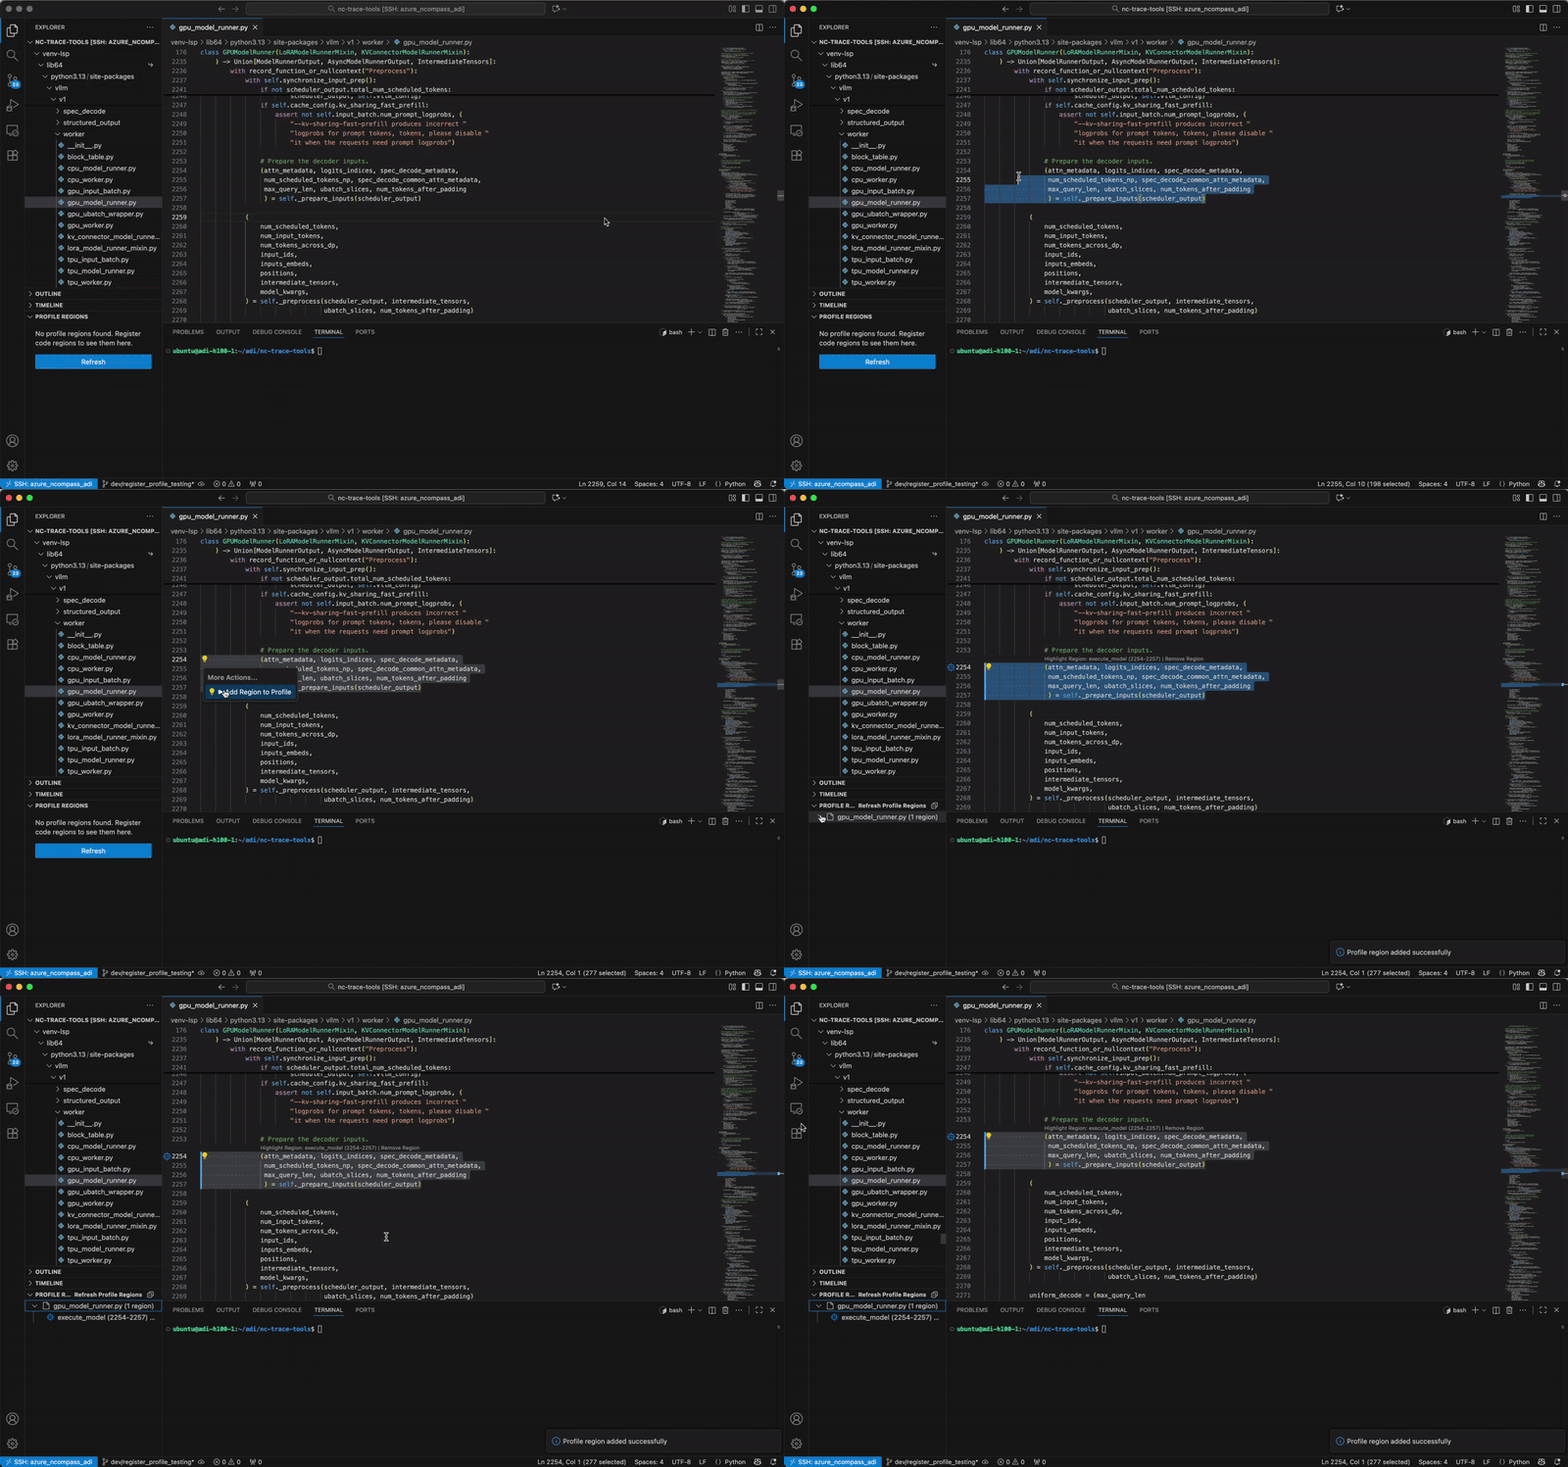
Now let’s mark some code for profiling:
-
Open a Python file in your project
-
Highlight a region of code you want to profile
-
Register it using any of these methods:
- Click the lightbulb (💡) that appears or press
Ctrl+./Cmd+.→ ”▶ Add Region to Profile” - Right-click → “Add Region to Profile”
- Press
Ctrl+Alt+R(Windows/Linux) orCmd+Alt+R(Mac)
- Click the lightbulb (💡) that appears or press
-
View your registered tracepoints in the Profile Regions view in the Explorer sidebar

For more details on how registered tracepoints work, see Registering Tracepoints.
Step 6: Run Your Code with the Tracepoints
Now instrument and run your code using the ncompass SDK.
The backend automatically generates a config.json file at <workspace>/.cache/ncompass/profiles/.default/.default/current/config.json by default.
The first .default corresponds to the ncprof.profiler.profileName and the second .default
corresponds to the ncprof.profiler.profileType VSCode settings.
For more information on available settings, see
Settings.
This is an example of you would use our SDK to integrate the tracepoints into your profiling script.
We currently only support TorchProfiler, but NVTX markers to instrument nsight systems code bases is coming soon.
from ncompass.trace.core.rewrite import enable_rewrites
from ncompass.trace.core.pydantic import RewriteConfig
import json

# Load the config generated by ncprof
config_path = ".cache/ncompass/profiles/.default/.default/current/config.json"
with open(config_path) as f:
    config = json.load(f)

# Enable code instrumentation with your registered tracepoints
enable_rewrites(config=RewriteConfig.from_dict(config))

# Import and run your code
# The tracepoints you registered will automatically have profiling markers injected
from your_module import your_function

# Run with PyTorch profiler enabled
import torch
with torch.profiler.profile(
    activities=[
        torch.profiler.ProfilerActivity.CPU,
        torch.profiler.ProfilerActivity.CUDA,
    ],
    with_stack=True,
) as prof:
    your_function()

# Export the trace
prof.export_chrome_trace("my_trace.json")
Run your profiling script:
python profile_my_code.pyThis generates a trace file (my_trace.json) with profiling markers at the tracepoints you registered.
Next Steps
You’ve completed the basic workflow! Now you can:
- Learn the complete workflow: Detailed guide on registering tracepoints, configuring profiles, and analyzing traces
- Explore backend management: Starting, stopping and checking the status of the backend
- Customize your setup: Configure profile names, auto-start behavior, and more
Common Tips
- Multiple tracepoints: You can register as many tracepoints as you need. They’ll all appear in the Profile Regions view.
- Remove tracepoints: Right-click on a tracepoint in the Profile Regions view and select “Remove Region”
- Different profiles: Use the
ncprof.profiler.profileNameandncprof.profiler.profileTypesettings to organize tracepoints into different profiles - Backend status: Use “NCProf: Check NCProf Backend Status” command to verify the backend is running correctly